3D Printing has remolded the way we create and design objects. By connecting your 3D printer to your PC, you can take advantage of the full range of features and capabilities available with this technology. With the proper setup, you can turn your computer into a powerful 3D printing machine.
If you own a 3D printer, connecting it to your PC opens up a world of possibilities. By establishing a seamless connection between your computer and your 3D printer, you can easily control the printing process, upload designs, and unleash your creativity.
In this article, we will explore the various methods for connecting your 3D printer to your PC, the software required, and the steps involved in the setup process.
Let’s dive in!
Benefits of Connecting a 3D Printer to a PC

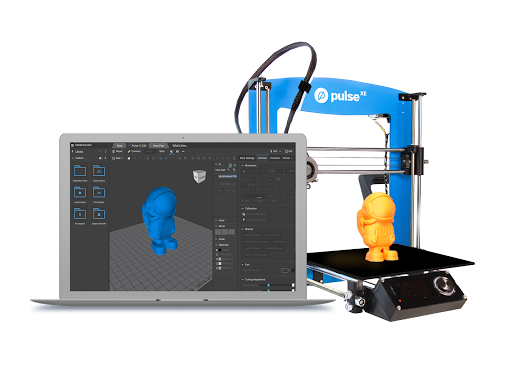
A 3D printer is connected to a laptop. Image source: 3D Printerly
Before delving into the connection options, let’s discuss the advantages of linking your 3D printer to your PC. Connecting your printer offers several benefits, including:
Enhanced control:
- By connecting your 3D printer to your PC, you gain complete control over the printing process. You can adjust settings, monitor progress, and make real-time modifications as needed.
- Efficient workflow: With a direct connection, you can quickly transfer design files from your computer to the printer, streamlining the printing workflow and eliminating the need for additional storage devices.
- Advanced functionality: Connecting your 3D printer to your PC opens access to a wide range of advanced software tools and features. This enables you to experiment with intricate designs, customize settings, and explore various printing techniques.
Understanding the Connection Options

3D printer accessories and a laptop placed on the table. Image source: The American Genius
When it comes to connecting your 3D printer to your PC, you have several options to choose from. Let’s explore the most common connection methods:
USB connection
The USB connection is the most straightforward and widely used method for linking a 3D printer to a PC. Most 3D printers come equipped with a USB port that allows for direct communication between the two devices. Simply connect the USB cable to the printer and your computer, and you’re ready to go.
Ethernet connection
For printers that support Ethernet connectivity, establishing a wired connection can offer excellent stability and reliability. By connecting your printer to your local network via an Ethernet cable, you can access it from any computer within the network.
Wi-Fi connection
Wireless connectivity provides convenience and flexibility, allowing you to connect your 3D printer to your PC without the hassle of cables. Some modern printers come with built-in Wi-Fi capabilities, enabling seamless communication between the printer and your computer.
Software for Connecting a 3D Printer to a PC
A laptop and a 3D printer. Image source: MatterHackers
Several software options are available for connecting a 3D printer to a PC that facilitates the connection and control of the printing process. These software applications provide a user-friendly interface and various features to enhance your 3D printing experience. Let’s explore some popular software options:
Ultimaker Cura:
Ultimaker Cura is a widely used and highly regarded 3D printing software. It allows you to prepare your 3D models for printing by adjusting settings like print quality, infill density, support structures, and more.
Cura supports 3D printers and offers features like model scaling, rotation, and slicing preview. It also provides monitoring capabilities during the printing process.
PrusaSlicer:
PrusaSlicer, developed by Prusa Research, is another powerful slicing software compatible with various 3D printers. It offers advanced features such as customizable support structures, intelligent layer height detection, and automatic mesh repair. PrusaSlicer also provides a user-friendly interface and extensive customization options for optimizing print settings.
Simplify3D:
Simplify3D is a comprehensive 3D printing software known for its advanced features and compatibility with a wide range of 3D printers.
It offers extensive control over print settings, including precise print customization, support structures, and multiple extruder configurations. Simplify3D also provides visualization tools for layer-by-layer previews and supports dual extrusion printing.
OctoPrint:
OctoPrint is a popular open-source software that enables remote monitoring and control of your 3D printer through a web interface. It allows you to manage print jobs, monitor progress via webcam, and make adjustments from any device connected to the same network as your printer. OctoPrint offers features like print queuing, time-lapse recording, and plugin support for expanding its functionality.
Repetier-Host:
Repetier-Host is a versatile software solution that supports multiple operating systems and a wide range of 3D printers. It provides a user-friendly interface for managing print settings, model preparation, and G-code visualization. Repetier-Host also offers real-time monitoring and control features, allowing you to pause, resume, or cancel prints as needed.
Installation and Setup Process
Once you have chosen the appropriate connection method for your 3D printer and PC, it’s time to proceed with the installation and setup process. Follow these steps to establish a seamless connection:
- USB connection: If you opt for a USB connection, ensure that your printer and computer are powered on. Connect one end of the USB cable to the designated port on your printer and the other end to an available USB port on your PC.
Your computer should automatically detect the printer, and you may need to install any required drivers or software provided by the manufacturer. Follow the on-screen instructions to complete the setup.
- Ethernet connection: To set up an Ethernet connection, connect one end of the Ethernet cable to the Ethernet port on your printer and the other end to an available Ethernet port on your router or network switch. Ensure that your printer and computer are connected to the same local network.
Next, install the necessary drivers or software on your PC as per the manufacturer’s instructions. Once the installation is complete, you should be able to access your printer over the network.
- Wi-Fi connection: For a Wi-Fi connection, make sure your 3D printer is Wi-Fi enabled. Access the printer’s settings menu and navigate to the Wi-Fi setup section. Follow the on-screen prompts to connect your printer to your home or office Wi-Fi network.
On your computer, install the required software or drivers provided by the manufacturer. Open the software, and it should detect your printer on the network. Follow any additional setup instructions to establish the connection.
Configuring printer settings
Once the connection between your 3D printer and PC is established, it’s essential to configure the printer settings for optimal performance. Here are a few key settings to consider:
- Print quality: Adjust the print quality settings based on your desired output. Higher print quality typically results in more detailed and accurate prints, but it may also increase printing time and material usage.
- Print bed calibration: Ensure that your print bed is properly leveled and calibrated. This step is crucial for achieving consistent and successful prints. Refer to your printer’s user manual or manufacturer’s guidelines for instructions on bed leveling.
- Filament type and temperature: Select the appropriate filament type and set the corresponding temperature on your printer. Different filaments require different temperatures to melt appropriately and produce high-quality prints.
- Print speed: Adjust the print speed to strike a balance between print quality and time. Higher speeds can reduce printing time but may impact the final print’s quality and accuracy.
Troubleshooting Connection Issues
Sometimes, you may encounter connectivity issues between your 3D printer and PC. Here are a few troubleshooting steps to help resolve common problems:
- Check cable connections: Ensure that all cables are securely connected between your printer and PC. Loose or damaged cables can disrupt the connection.
- Restart devices: Try restarting both your printer and PC to reset any temporary glitches that may be affecting the connection.
- Update drivers and software: Make sure you have the latest drivers and software installed for your printer. Visit the manufacturer’s website for any available updates.
- Check network settings: If using a network connection, verify that your printer and PC are connected to the same network. Ensure that there are no network configuration issues or conflicts.
Best Practices for Maintaining a Stable Connection
To ensure a stable and reliable connection between your 3D printer and PC, consider the following best practices:
- Keep software up to date: Regularly update the firmware, drivers, and software associated with your printer. Manufacturers often release updates to improve compatibility and address any known issues.
- Avoid network congestion: If using a Wi-Fi connection, ensure that your Wi-Fi connection, ensure that your printer and PC are within a reasonable range of your wireless router. Additionally, minimize interference from other devices by positioning them away from your printer and router.
- Maintain a clean and organized workspace: Keep your printer and PC area clean and free from dust or debris that can interfere with the connection. Organize cables neatly to avoid accidental disconnections.
- Regularly perform maintenance tasks: Clean your printer’s extruder and print bed regularly to ensure smooth operation. Check for any loose connections or worn-out cables that may affect the connection.
- Backup your designs and files: It’s always a good idea to have a backup of your 3D printing designs and files. Store them on your PC or cloud storage to prevent data loss and facilitate easy access.
Additional Accessories for Enhanced Connectivity
If you want to further enhance the connectivity of your 3D printer to your PC, consider these additional accessories:
- OctoPrint: OctoPrint is a popular open-source software that allows remote monitoring and control of your 3D printer. It offers a web interface that you can access from any device connected to the same network as your printer.
- Webcam: Connecting a webcam to your PC lets you remotely monitor the printing process. You can keep an eye on the progress and ensure everything is running smoothly, even if you’re not physically present.
- Smart plugs: Smart plugs enable you to remotely turn on and off your printer. This can be useful for scheduling prints or managing power consumption.
- Filament run-out sensor: Adding a filament run-out sensor to your printer ensures that you’re alerted when the filament is about to run out. This feature prevents interruptions during long printing jobs.
Unlock 3D Printing With the Click of a Mouse!
Connecting your 3D printer to your PC opens up a world of possibilities in terms of control, convenience, and creativity. Whether you choose a USB, Ethernet, or Wi-Fi connection, following the proper installation and setup process is crucial. Configuring printer settings, troubleshooting connection issues, and practicing best connectivity practices ensure a smooth and stable connection. By utilizing additional accessories, you can enhance the connectivity and functionality of your 3D printer. Embrace the power of connecting your 3D printer to your PC and unleash your imagination to bring your designs to life.